
Pinhole Camera's

Materials:

  • light sensitive photographic paper
  • pinhole camera 
  • developer, fixative, stop and wash (or Ilford print developing machine)


Processes:


The process of using the pinhole camera began by first taking a pinhole camera (made from a shoe box) into the darkroom so that when I collected the light-sensitive paper and placed it inside the pinhole camera emulsion side up, the paper was not exposed to any light because the light-sensitive photographic paper does not get exposed to the red light (safe light) within the darkroom. I then went outside with the pinhole camera and experimented, trying different things to see what worked best with the greatest outcomes from the final print. I made sure that the pinhole was completely sealed shut with the black material, making sure that no light was leaking in, overexposing the paper and in theory spoiling the print. I then brought the pinhole camera back into the darkroom and put it into the print developing machine and waited for the final print to develop.


Technical Skills:

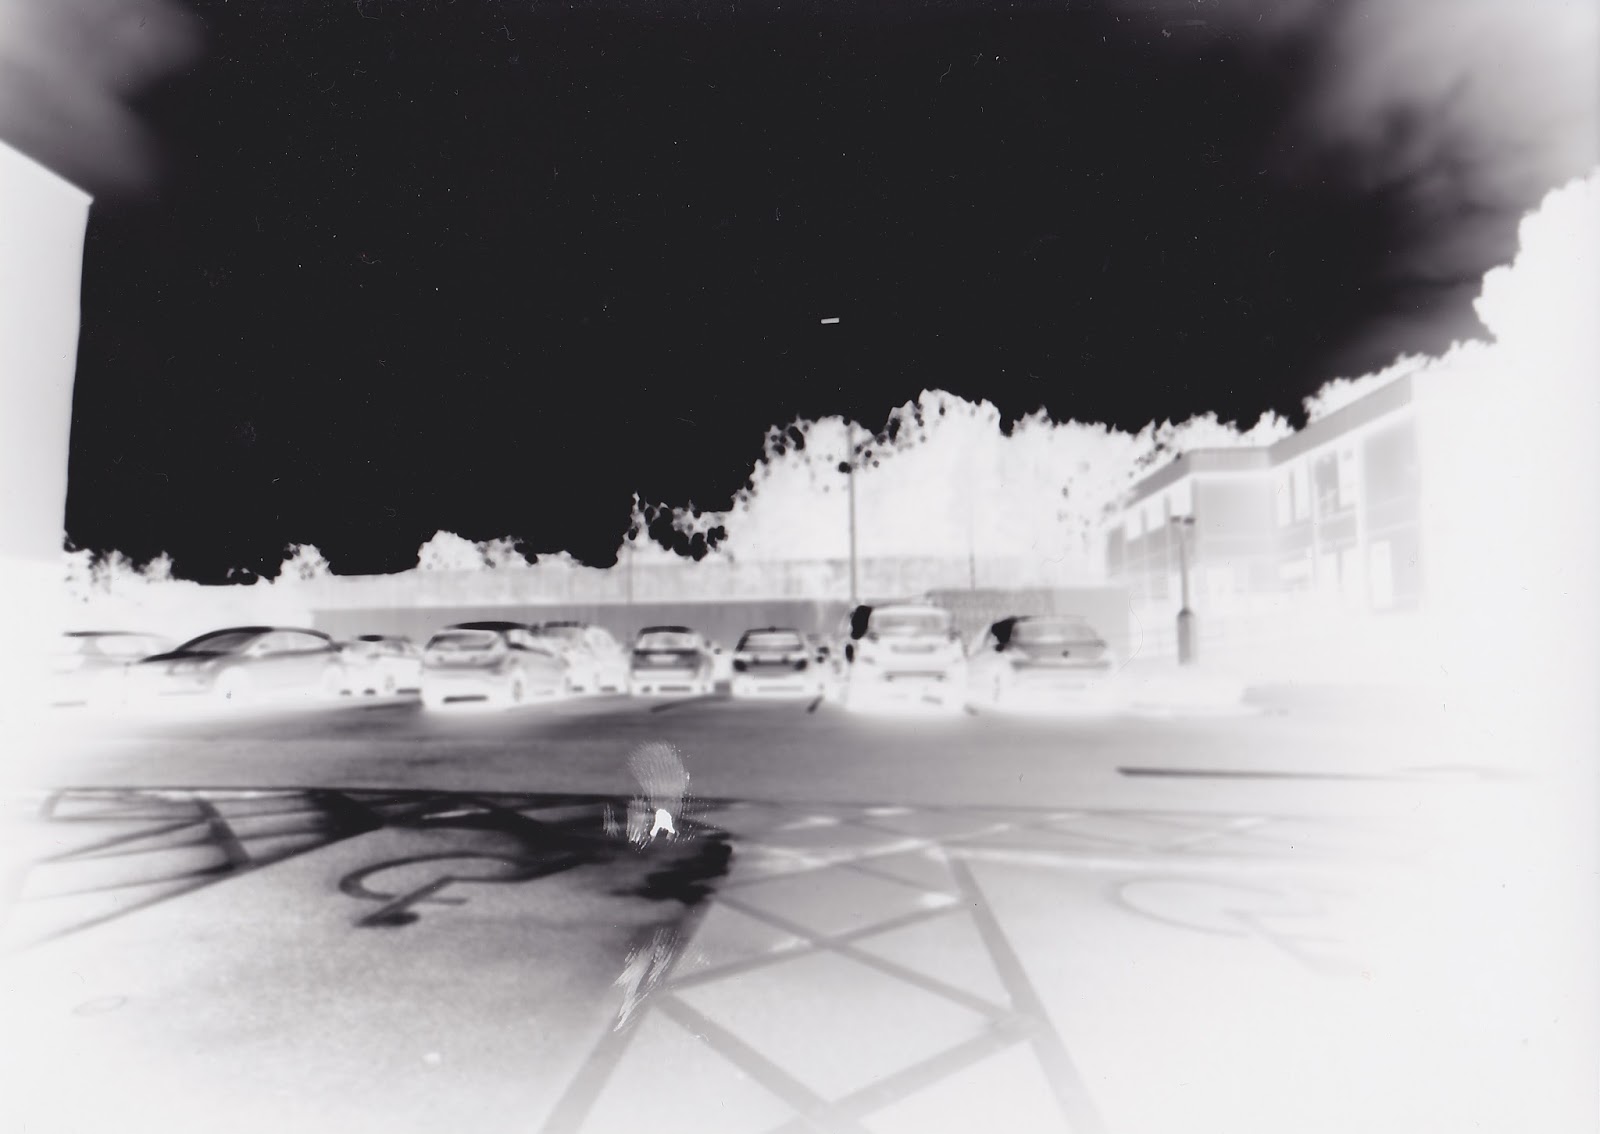
Through the process above, I learned some technical skills, which first includes the exposure times. I learned that when using the pinhole camera in a darkened environment or capturing a dark subject matter, then the light-sensitive paper should be exposed to more light meaning that it needs a longer exposure time of around 20-30 seconds. Also, it works the opposite way, with a lighter scene which means that it may not need a long exposure time and instead have a shorter exposure time of around 10 seconds. I found this out by experimenting with different environments and different kinds of lighting. The second technical skill that I learned was that when using a pinhole camera, you need to get as close to the subject matter as possible in order to achieve the best final outcomes which have distortion and obscures the subject matter that I was capturing.
My prints can be seen below, starting with my experimental prints using the pinhole camera followed by my personal best print.


REFER TO SKETCHBOOK FOR ANNOTATION

Comments

Popular posts from this blog

Stitching/Panorama

I created a stitched (photo merge) image by taking many photographs which overlap very slightly in order to produce a final panoramic image. I began by opening photoshop and going to the "File" menu and then "Automate" and then clicking on "Photomerge". By doing this, it opens up a tab which allows me to change what sort of photo merge I am going to produce and it also allows me to browse the files that I would like to use for the photo merge. I then browsed through my files to find the exact files that I wanted to use. Once I clicked open, it layered and merged the photos together into one final panoramic image. Once the final image was created I flattened the image by hovering over the "Layer" and then clicked on "Flatten Image" which brought all the layer into one. Below are my 2 final panoramic images that I created. The 2 final images above are underexposed so when I create a panoram...

Editing in RAW

When shooting in RAW, which contains data which is minimally processed either from an image sensor of a digital camera. This format is unready for printing because they are not processed. In order to process the image, I double clicked on the RAW, unprocessed image in the location that the image was in. This then opened up camera RAW which allowed me to make manipulations, improvements and changes to many different things.  Once I had finished making the changes that I wanted to the image, I had to save it. When i saved the image I changed the format to TIFF so that I could print the image and I saved it again but this time as a JPEG so that I could put it onto my blog. Below is the edited versions of my photographs. 

Adam Fuss

Source: http://www.cheimread.com/artists/adam-fuss "I see the photogram as being much more truthful and more honest because it's just recording light. There is no manipulation of that light, in the way that a lens manipulates light." - Adam Fuss Adam Fuss was born in 1961 in London but he grew up mainly in Australia. In 1980 Fuss started working as a photographic apprentice at Ogilvy & Mather Agency. He later made a move to New York, this is where he first started to record and document the natural environment around him through photography using a pinhole camera. This later guided Adam to experiment with alternative photographic processes, which later on led to him abandoning using the camera completely. Fuss's photographic works are unique for their contemporary reinterpretation of the earliest techniques of photography, specifically the photograms and camera-less techniques. Fuss believes that to make photographic techniques work, they should be person...